Android applications are composed of a set of components that perform specific functions and work together to create the user experience. There are four main components of an Android application:
Android Activities
Creating and Managing UI Screens in Your App
What is an Activity in Android?
An Activity is a single, focused task that represents a UI screen or a user interface. It is one of the essential components of an Android app that provides a user interface to interact with the app.
In simpler terms, an Activity is like a window that appears on your Android device when you open an app. It contains various UI elements, such as text fields, buttons, images, etc., and allows users to interact with the app.
Creating an Activity
To create an Activity in Android, you need to follow these steps:
Open Android Studio and create a new project.
Right-click on the project folder and select "New > Activity > Empty Activity".
Enter the Activity name and layout name, then click on "Finish".
This will create a new Activity with an associated layout file.
Activity Lifecycle
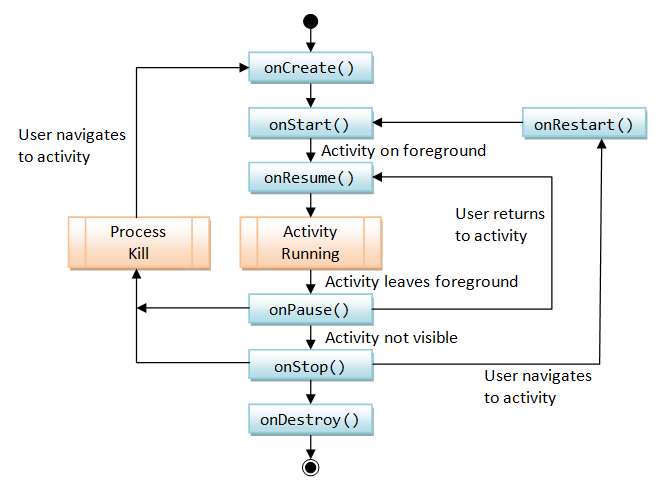
An Activity in Android goes through various states during its lifecycle, such as onCreate(), onStart(), onResume(), onPause(), onStop(), onRestart(), and onDestroy(). Understanding the Activity lifecycle is essential for developing robust and efficient Android apps.

Img Ref. - NTU.edu
Here is a brief overview of the Activity lifecycle:
onCreate(): This is the first method called when an Activity is created. It is used to initialize the Activity and inflate the layout.
onStart(): This method is called when the Activity becomes visible to the user.
onResume(): This method is called when the Activity is in the foreground and has focus.
onPause(): This method is called when the Activity loses focus but is still visible to the user.
onStop(): This method is called when the Activity is no longer visible to the user.
onRestart(): This method is called when the Activity is restarted after being stopped.
onDestroy(): This method is called when the Activity is destroyed.
Examples of Activities
Let's look at some examples of Activities in Android:
Example 1: Simple Activity
Here is an example of a simple Activity in Android:
public class MainActivity extends AppCompatActivity {
    @Overrideprotected void onCreate(Bundle savedInstanceState) {
        super.onCreate(savedInstanceState);
        setContentView(R.layout.activity_main);
    }
}
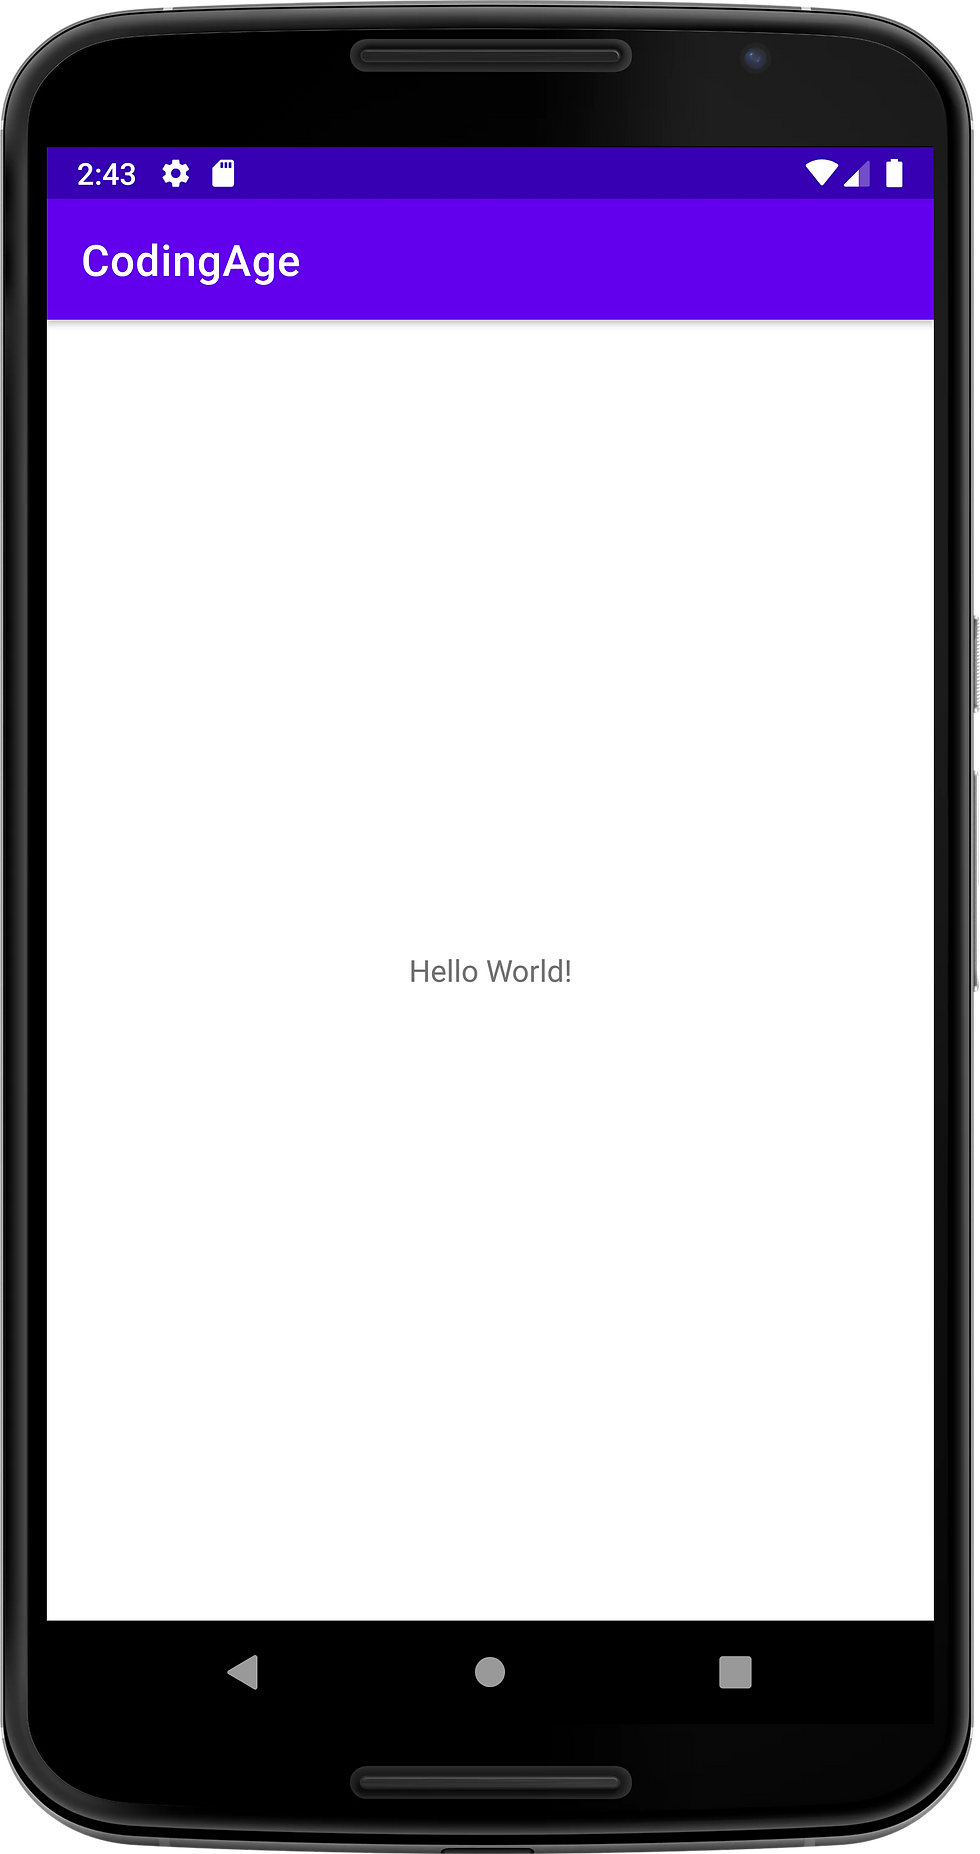
This code creates a new Activity named MainActivity that inflates the layout file activity_main.xml using the setContentView() method. This will create simple app as shown below -

Example 2: Activity with Button Click Listener
Here is an example of an Activity with a button click listener in Android:
public class MainActivity extends AppCompatActivity {
    @Overrideprotected void onCreate(Bundle savedInstanceState) {
        super.onCreate(savedInstanceState);
        setContentView(R.layout.activity_main);

        Button myButton = findViewById(R.id.myButton);
        myButton.setOnClickListener(new View.OnClickListener() {
            @Overridepublic void onClick(View view) {
       Toast.makeText(MainActivity.this, "Button clicked!", Toast.LENGTH_SHORT).show();
            }
        });
    }
}
This code creates a new Activity with a button named myButton and adds an onClickListener to display a toast message when the button is clicked.
Example 3: Activity with all the lifecycle
Here's an example that covers all the lifecycle activities in Android:
public class MainActivity extends AppCompatActivity {

    private static final String TAG = "MainActivity";

    @Overrideprotected void onCreate(Bundle savedInstanceState) {
        super.onCreate(savedInstanceState);
        setContentView(R.layout.activity_main);
        Log.d(TAG, "onCreate() called");
    }

    @Overrideprotected void onStart() {
        super.onStart();
        Log.d(TAG, "onStart() called");
    }

    @Overrideprotected void onResume() {
        super.onResume();
        Log.d(TAG, "onResume() called");
    }

    @Overrideprotected void onPause() {
        super.onPause();
        Log.d(TAG, "onPause() called");
    }

    @Overrideprotected void onStop() {
        super.onStop();
        Log.d(TAG, "onStop() called");
    }

    @Overrideprotected void onDestroy() {
        super.onDestroy();
        Log.d(TAG, "onDestroy() called");
    }

    @Overrideprotected void onRestart() {
        super.onRestart();
        Log.d(TAG, "onRestart() called");
    }
}
In this example, we have overridden all the lifecycle methods of the Activity and added a log message to each of them. Whenever the Activity goes through a state change, the corresponding log message will be displayed in the Android Monitor.
To test this example, you can run the app on an Android device or emulator and observe the log messages in the Android Monitor as you interact with the app.
activity_main.xml file for the above code:
<?xml version="1.0" encoding="utf-8"?><RelativeLayout xmlns:android="http://schemas.android.com/apk/res/android"
xmlns:tools="http://schemas.android.com/tools"
android:layout_width="match_parent"
android:layout_height="match_parent"
tools:context=".MainActivity">
<TextView
android:id="@+id/textView"
android:layout_width="wrap_content"
android:layout_height="wrap_content"
android:text="Hello World!"
android:textSize="24sp"
android:layout_centerInParent="true"/>
</RelativeLayout>
This layout file contains a single TextView widget that displays the text "Hello World!" in the center of the screen. You can customize this layout to add more widgets or modify the existing ones, depending on your app's requirements.
Activities can also communicate with each other using intents. An intent is a message that can be sent to the Android system to request an action or to start a new activity. An activity can start another activity by sending an intent that specifies the class name of the target activity. The target activity can receive data from the calling activity via the intent, and return a result to the calling activity when it finishes.
Activities are one of the essential components of an Android app. They provide a user interface for users to interact with the app and go through various states during their lifecycle. By understanding the Activity lifecycle and creating Activities with proper design and functionality, you can develop robust and efficient Android apps.
Android Services
Overview
A service is a component in an Android app that performs long-running operations in the background without the need for a user interface. Services can be started and stopped by other components of the app or by the system itself.
There are two types of services in Android:
Started Services: These are services that run in the background to perform a single operation and stop themselves when the operation is complete.
Bound Services: These are services that provide a client-server interface, allowing clients to bind to the service, send requests, and receive results.
Services are useful for performing tasks that need to continue running even when the app is not visible or actively running. Examples include playing music in the background, downloading files from the internet, and tracking the user's location.
Creating a Service
To create a service in Android, you need to create a new class that extends the Service class. Here's an example:
public class MyService extends Service {

    @Override
public void onCreate() {
        super.onCreate();
        // Code to initialize the service
    }

    @Override
public int onStartCommand(Intent intent, int flags, int startId) {
        // Code to start the servicereturn START_STICKY;
    }

    @Override
public void onDestroy() {
        super.onDestroy();
        // Code to stop the service
    }

    @Override
public IBinder onBind(Intent intent) {
        // Code to bind the servicereturn null;
    }
}
In this example, we've created a new service class called MyService. We've overridden the onCreate(), onStartCommand(), onDestroy(), and onBind() methods to provide the functionality we need.
Started Services
A started service is a service that runs in the background to perform a single operation and stops itself when the operation is complete. To start a started service, you can use the startService() method, passing in an Intent object that specifies the service to start.
Here's an example:
Intent intent = new Intent(this, MyService.class);
startService(intent);
In this example, we're starting a service of type MyService using the startService() method. This will cause the onCreate() method of the service to be called, followed by the onStartCommand() method.
Bound Services
A bound service is a service that provides a client-server interface, allowing clients to bind to the service, send requests, and receive results. To bind to a bound service, you can use the bindService() method, passing in an Intent object that specifies the service to bind to.
Here's an example:
Intent intent = new Intent(this, MyService.class);
bindService(intent, connection, Context.BIND_AUTO_CREATE);
In this example, we're binding to a service of type MyService using the bindService() method. We're also passing in a ServiceConnection object called connection, which will be used to communicate with the service.
Lifecycle of a Service
The lifecycle of a service is similar to that of an activity. When a service is first created, the onCreate() method is called. After that, the onStartCommand() method is called when the service is started using the startService() method. Finally, the onDestroy() method is called when the service is stopped.
For bound services, the onBind() method is called when a client binds to the service using the bindService() method.
Examples of Services
Let's take some examples to understand how services work in Android.
Example of Started Service
In this example, we will create a started service that will download an image from the internet and store it in the device's internal storage. This service will run once and then stop itself.
Create a new project in Android Studio.
In the MainActivity class, add the following code:
public class MainActivity extends AppCompatActivity {

    private static final String TAG = "MainActivity";
    private Button mButtonStartService;

    @Override
protected void onCreate(Bundle savedInstanceState) {
        super.onCreate(savedInstanceState);
        setContentView(R.layout.activity_main);

        mButtonStartService = findViewById(R.id.button_start_service);
        mButtonStartService.setOnClickListener(new View.OnClickListener() {
            @Override
        public void onClick(View view) {
     Intent intent = new Intent(MainActivity.this, DownloadService.class);
                startService(intent);
            }
        });
    }
}
In the DownloadService class, add the following code:
public class DownloadService extends Service {

    private static final String TAG = "DownloadService";

    @Override
public int onStartCommand(Intent intent, int flags, int startId) {
        Log.d(TAG, "onStartCommand: Service started");

  // download image from internet and store it in internal storage
       // stop the service
        stopSelf();
        return START_NOT_STICKY;
    }

    @Nullable
@Override
    public IBinder onBind(Intent intent) {
        return null;
    }
}
In the activity_main.xml file, add the following code:
<RelativeLayout
 xmlns:android="http://schemas.android.com/apk/res/android"
xmlns:tools="http://schemas.android.com/tools"
android:layout_width="match_parent"
android:layout_height="match_parent"
tools:context=".MainActivity">
<Button
android:id="@+id/button_start_service"
android:layout_width="wrap_content"
android:layout_height="wrap_content"
android:text="Start Service"
android:layout_centerInParent="true"/>
</RelativeLayout>
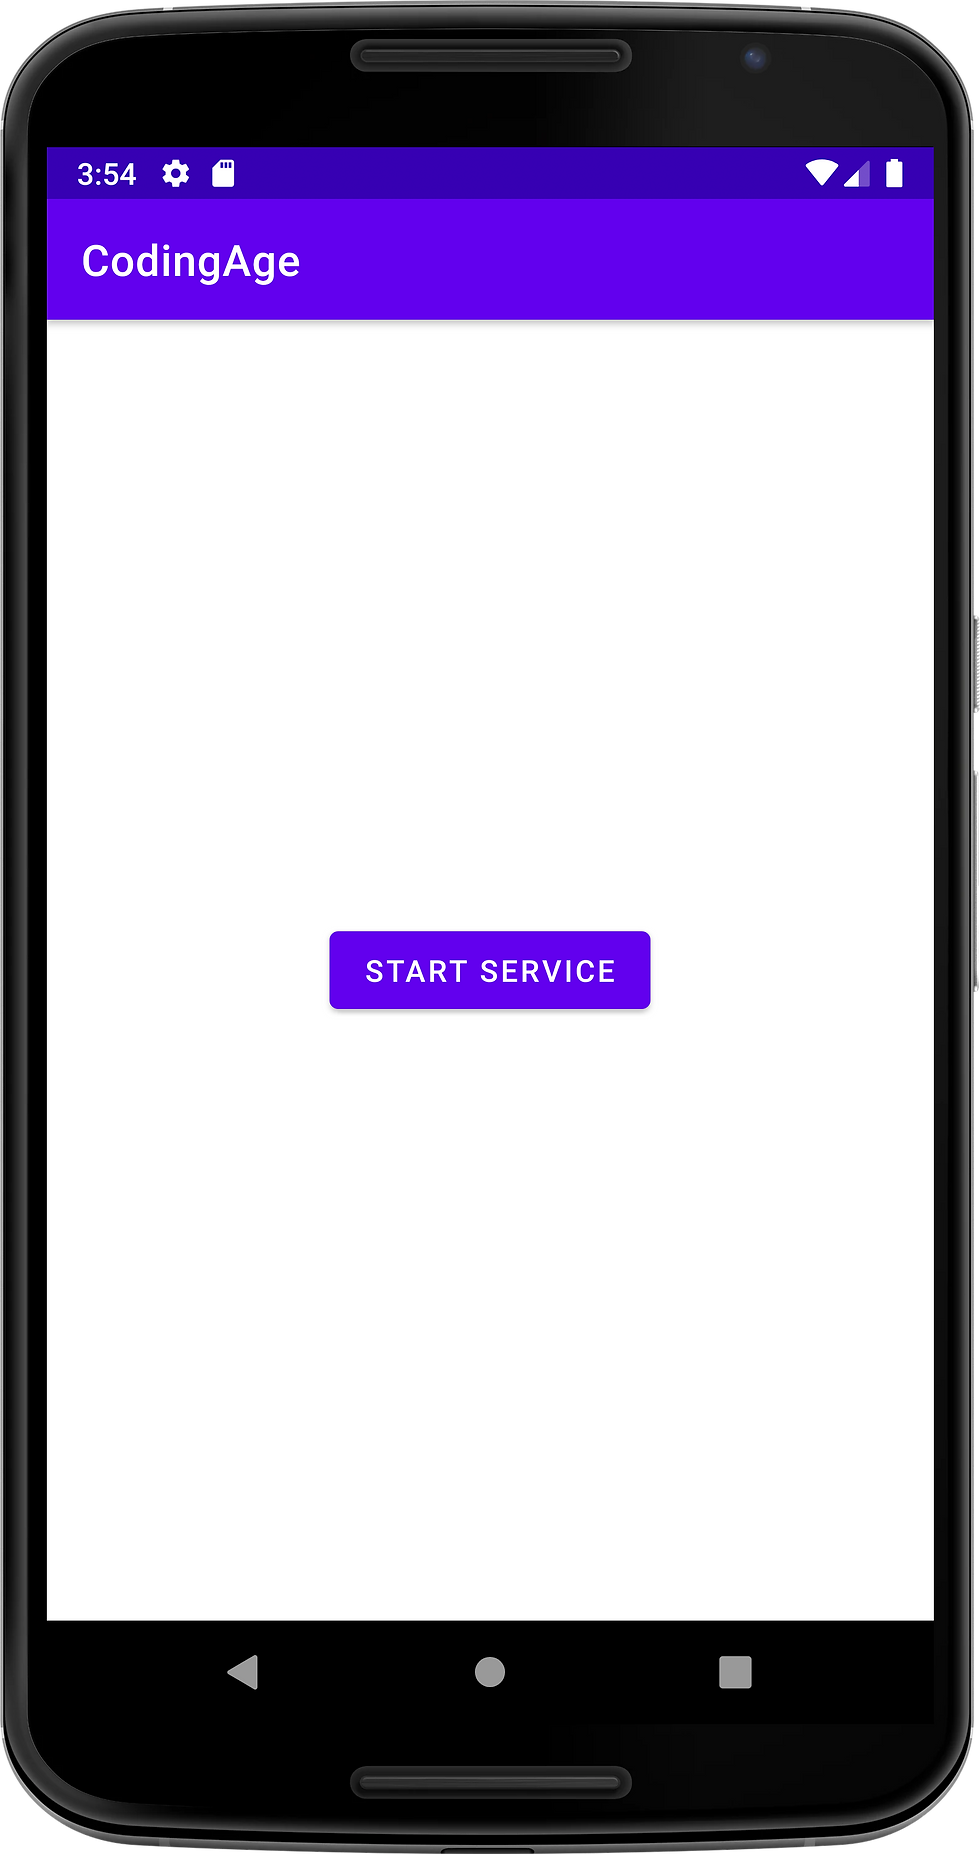
In this example, we have created a started service named DownloadService. When the user clicks on the Start Service button, it will start the service. The service will download an image from the internet and store it in the device's. The app will look like this -

Services are an important component of the Android platform, as they allow your application to perform background tasks and long-running operations, even when your application is not currently in the foreground. By understanding the different types of services and their lifecycle, you can create more efficient and effective applications.
Thanks for reading, and happy coding!
